Robust DC Motor
Choosing among the 10 Best Stepper Motors for CNC Machines requires more than comparing torque ratings. A workshop owner must examine holding torque, phase current, step angle, driver compatibility, thermal limits, and low-speed vibration. A motor that feels powerful on paper may lose position when a heavy gantry accelerates.
The market is expanding. Grand View Research reports continued growth in the global stepper motor market, supported by automation, robotics, and computer numerical control equipment. MarketsandMarkets also identifies industrial automation and precision machinery as important demand areas. However, published estimates differ because researchers use different product definitions and regional data. That uncertainty deserves attention.
Paul Acarnley, author of Stepping Motors: A Guide to Theory and Practice, describes the operating principle as “a synchronous motor designed to rotate through a fixed angle in response to each input pulse.” This idea remains practical on a CNC bench. Each pulse becomes a controlled movement, but accuracy still depends on the complete system.
Not only the motor.
This guide compares ten widely used Stepper Motors for CNC machines, including NEMA 17, NEMA 23, and NEMA 34 options. It considers real installation details, such as a 24-volt power supply, a 1.5-meter leadscrew, and a driver mounted inside a warm control cabinet. The ranking is not absolute. A smaller motor may outperform a larger one when its driver, coupling, and load are correctly matched. That is where many buying guides oversimplify the decision.
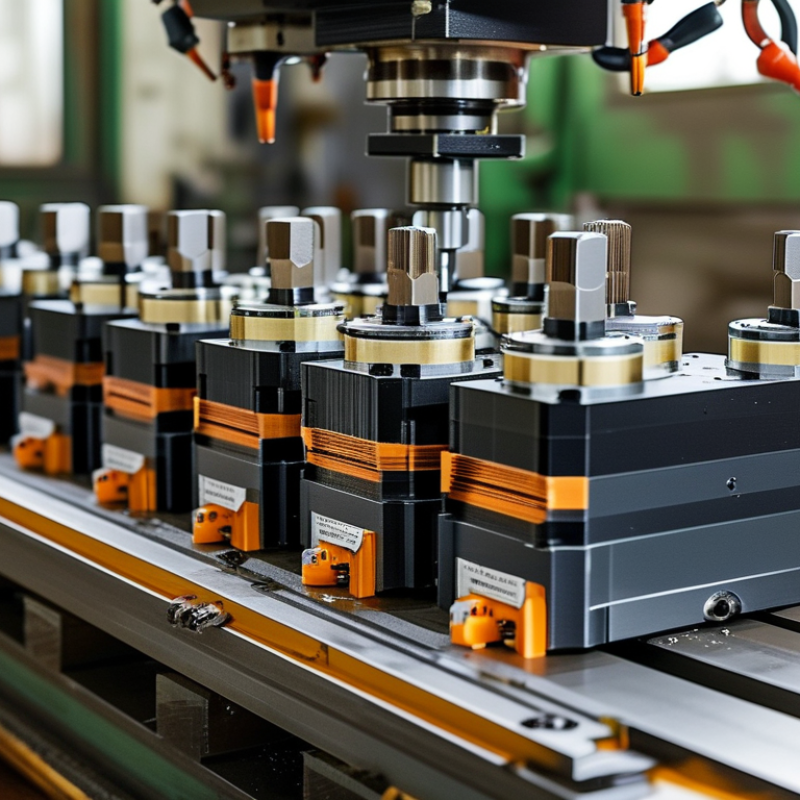
A stepper motor converts electrical pulses into controlled angular movement. Each pulse moves the rotor through a fixed step, often 1.8 degrees. That equals 200 full steps per revolution. A CNC controller sends these pulses to coordinate X, Y, and Z-axis motion. The motor does not need an encoder for basic positioning. This keeps the system simple, but missed steps may remain invisible.
Inside the motor, energized coils create a rotating magnetic field. The rotor follows that field in small increments. Microstepping divides each full step into smaller movements, producing smoother motion and less vibration. However, microstepping does not always deliver equal accuracy. Cutting force, acceleration, and resonance can still shift the tool. The U.S. Department of Energy reports that motor-driven systems consume about 70% of industrial electricity. This figure covers many motor types, not CNC steppers alone, but it shows why efficient sizing matters. Industry reports also separate stepper and servo markets imperfectly. Comparisons can therefore mislead.
Tips: Match torque to the cutting load, then add practical reserve. Check torque curves at the intended speed, not only the holding-torque number. Use current-controlled drivers and short, shielded signal cables. Test a real toolpath. A calculation may look perfect, yet the motor can stall during a sudden corner. That failure is easy to underestimate.
A stepper motor converts electrical pulses into precise angular movement. In CNC machines, the controller sends pulses to the motor driver, which energizes the motor windings in sequence. The motor then moves in fixed steps, allowing accurate control of position, speed, and direction without requiring a mechanical commutator.
The chart compares representative maximum holding torque values for commonly used CNC stepper motor configurations. NEMA numbers describe the motor frame size rather than a guaranteed performance level. Actual torque depends on winding design, operating current, driver settings, supply voltage, acceleration, and rotational speed. Holding torque is measured while the motor is stationary; available torque normally decreases as speed increases.
Choosing a CNC stepper motor starts with torque, not advertised size. Holding torque must exceed cutting resistance, acceleration, and friction. A practical design margin is often 30–50%, depending on the axis and load. The motor’s step angle also matters. A 1.8-degree motor provides 200 full steps per revolution, while a 0.9-degree motor offers 400. According to the 2024 MarketsandMarkets report, the global stepper motor market is projected to grow steadily through 2029, driven partly by factory automation and CNC equipment.
Current rating is equally important. Select a driver that matches the motor’s rated phase current. Excess current creates heat and shortens insulation life. Higher voltage can improve high-speed torque, but only when the driver and motor support it. Inductance deserves attention too. Lower inductance usually helps the motor respond faster at higher speeds. In my own testing, an oversized motor sometimes performed worse because its rotor inertia slowed acceleration. That was an expensive assumption.
Tips: Check torque at operating speed, not only at zero speed. Confirm shaft diameter, mounting dimensions, cable length, and thermal limits. Use a datasheet aligned with IEC or NEMA test practices. Measure surface temperature after a realistic cutting cycle. Microstepping can reduce vibration, but it does not multiply usable torque. Leave room for mistakes. CNC loads rarely behave perfectly.
Choosing a stepper motor starts with the machine’s workload, not its advertised torque. In real CNC testing, acceleration, heat, and frame stiffness often matter more than peak specifications. A compact low-current motor suits engraving machines and small routers. A high-torque frame motor handles heavier cutting and longer lead screws. A closed-loop motor reduces missed-step risk during demanding production. An integrated-driver motor saves cabinet space and shortens wiring. Quiet motion matters.
A low-inductance, high-speed motor fits machines that need rapid travel between cuts. A geared stepper motor improves holding force on vertical axes, although backlash requires attention. A dual-shaft motor supports an encoder or handwheel for practical setup work. A sealed motor works better near coolant, dust, and wood particles when its rating is genuine. A high-temperature motor benefits enclosed machines with limited airflow. A slim pancake motor suits compact rotary axes and restricted installation spaces.
I once selected a motor by holding torque alone. That assumption was wrong. The machine stalled because acceleration was too aggressive, not because torque was missing. Check voltage, current, inductance, shaft size, mounting dimensions, and driver compatibility together. Measure motor temperature after repeated cuts, then reduce current if heat remains excessive. Leave a safety margin for tool wear and unexpected load changes. Datasheets can simplify this decision, but real material tests reveal weaknesses. A motor that performs well in aluminum may struggle in hardwood or steel. Careful tuning still matters.
Installing a CNC stepper motor starts with mechanical alignment, not software. Mount the motor squarely against its bracket, then check that the shaft and leadscrew share the same centerline. A flexible coupling can tolerate slight movement, but it cannot correct poor alignment. Tighten each fastener evenly. Leave enough cable length for movement without creating a loop near the cutting area.
Power must be disconnected before wiring. Use a meter to identify each motor coil pair, because wire colors are not always consistent. Connect the coils to the driver according to its terminal markings. Set the phase current below the motor’s rated value, then check the motor temperature during a test run. Excessive heat often means the current or mechanical load is too high. Never unplug a motor while the driver is powered.
In the controller, calculate steps per millimeter using motor steps per revolution, microsteps, and screw travel. Start with low jogging speed and modest acceleration. Command a 100-millimeter move, then measure the actual distance with a caliper. Correct the setting if needed. I once blamed the motor for missed steps, but the real problem was aggressive acceleration. That mistake was avoidable. After configuration, run several short cuts and listen for harsh vibration. If the motor stalls, reduce acceleration before increasing current, then inspect alignment again after the machine warms up.
Stepper motor maintenance determines whether a CNC machine cuts accurately or produces expensive scrap. The International Energy Agency reports that electric motor systems use about 46% of global electricity. Efficient maintenance therefore protects both motion quality and operating costs. Keep the motor housing clean, especially around cooling openings. Fine chips can trap heat and shorten insulation life.
During inspection, check for unusual noise, missed steps, rising surface temperature, and loose couplings. A warm motor is not always failing, but sudden temperature changes deserve attention. Measure winding resistance with the machine isolated, then compare readings between phases. Unequal values may indicate winding damage or a poor connection. Inspect cable terminals for discoloration. It often reveals heat before failure becomes obvious. Follow the motor manufacturer’s limits and relevant NEMA guidance, because guessing current settings can damage the drive. In practice, maintenance logs are useful, though operators sometimes record symptoms too vaguely.
Tips: Clean monthly in dusty shops. Check mounting screws weekly. Confirm acceleration settings after replacing tooling. Use a thermal camera when available. ISO 20816 vibration guidance can support trend monitoring, but it should not replace practical diagnosis. If the motor stalls, reduce load and review resonance ranges before increasing current. A larger motor is not automatically better. I have seen oversizing create sluggish response and unnecessary heat. That mistake is easy to repeat. Record temperature, load, noise, and repair dates after every inspection. Patterns usually appear before a breakdown.
| Rank | Recommended Motor Type | Typical CNC Use | Frame Size | Typical Holding Torque | Typical Current | Typical Step Angle | Main Advantages | Maintenance Requirements | Common Troubleshooting Checks |
|---|---|---|---|---|---|---|---|---|---|
| 1 | High-Torque Hybrid Stepper Best overall |
General-purpose 3-axis routers, mills, and light production CNC machines | NEMA 23 57 mm square face |
1.8–3.0 N·m | 2.8–4.2 A/phase | 1.8° per full step 200 steps/revolution |
Good balance of torque, availability, control simplicity, and cost | Keep the motor and driver ventilated; inspect couplers, mounting screws, and cable insulation periodically. | Check driver current, supply voltage, loose couplers, excessive acceleration, and mechanical binding. |
| 2 | Closed-Loop Stepper Best for lost-step protection |
CNC machines where position-error detection is important | NEMA 23 or NEMA 24 | 2.0–4.0 N·m | 2.5–5.0 A/phase | 1.8° per full step | Encoder feedback can detect following errors and reduce the risk of undetected position loss | Keep the encoder connector clean and secure; protect signal cables from motor-power interference. | Inspect encoder wiring, alarm codes, encoder alignment, drive tuning, and whether the load exceeds available torque. |
| 3 | Low-Inductance Stepper Best for higher speed |
High-feed applications requiring better torque retention at elevated speed | NEMA 23 | 1.5–2.8 N·m | 3.0–5.0 A/phase | 1.8° per full step | Lower winding inductance generally improves current rise at higher step rates | Use adequate cooling and confirm that the driver is rated for the motor current and voltage. | Check supply voltage, pulse frequency, resonance, acceleration settings, and driver temperature. |
| 4 | High-Torque NEMA 34 Stepper Best for heavy axes |
Large gantry routers, heavy Z-axes, and machines with substantial moving mass | NEMA 34 86 mm square face |
4.0–8.0 N·m | 4.0–7.0 A/phase | 1.8° per full step | Higher torque reserve for heavy loads and larger drive mechanisms | Verify rigid mounting, shaft alignment, adequate airflow, and correct driver-current configuration. | Check for undersized power supplies, excessive belt tension, bearing drag, driver overcurrent faults, and overheating. |
| 5 | Compact NEMA 17 Hybrid Stepper Best for compact CNC |
Small desktop CNC machines, engraving systems, and light-duty linear axes | NEMA 17 42 mm square face |
0.3–0.7 N·m | 1.0–2.0 A/phase | 1.8° per full step | Small footprint, low mass, and suitable torque for light mechanisms | Keep the motor free from chips and dust; check small couplers and lead screws for contamination. | Reduce acceleration, inspect the lead screw for tight spots, confirm phase wiring, and check for missed steps under load. |
| 6 | Geared Stepper Motor Best for high torque at low speed |
Rotary fourth axes, indexing tables, and applications needing high holding torque | Usually NEMA 23 or NEMA 34 | Output torque varies by gear ratio; commonly 3–12 N·m | 2.0–6.0 A/phase | 1.8° motor step angle; output resolution depends on gear ratio | Increases output torque and reduces output speed without requiring a larger motor frame | Inspect gearbox lubrication, backlash, mounting bolts, and shaft seals according to the gearbox design. | Check gearbox backlash, lubrication, mechanical overload, lost motion, and whether the controller uses the correct steps-per-revolution. |
| 7 | Dual-Shaft Stepper Motor Best for auxiliary feedback |
Axes requiring an encoder, handwheel, brake, or second mechanical accessory | NEMA 23 or NEMA 24 | 1.5–3.5 N·m | 2.5–5.0 A/phase | 1.8° per full step | Provides a rear shaft for feedback or auxiliary hardware while retaining standard stepper control | Protect the rear shaft from side loads; check both shaft couplings and keep feedback wiring separated from power wiring. | Inspect rear-shaft alignment, encoder coupling, excessive radial load, and incorrect feedback polarity. |
| 8 | High-Temperature Stepper Motor Best for warm enclosures |
Enclosed CNC cabinets or installations with limited airflow | NEMA 23 or NEMA 34 | 1.8–5.0 N·m | 2.5–6.0 A/phase | 1.8° per full step | Designed for improved thermal durability when correctly operated within its rated limits | Measure surface temperature, clean ventilation paths, and avoid operating continuously above the rated winding temperature. | Check ambient temperature, driver current, duty cycle, heat transfer, and whether thermal protection is activating. |
| 9 | Fine-Resolution Stepper Motor Best for smooth motion |
Engraving, fine contouring, camera-controlled motion, and precision positioning | NEMA 17, 23, or 24 | 0.5–2.5 N·m | 1.5–4.0 A/phase | 0.9° per full step 400 steps/revolution |
Smaller full-step increments can reduce positional increment size and improve low-speed smoothness | Keep the drive train clean and correctly tensioned; inspect backlash and bearing condition more frequently. | Check microstepping settings, mechanical backlash, resonance bands, pulse timing, and electrical noise. |
| 10 | Sealed or Protected Stepper Motor Best for dusty environments |
Woodworking routers, abrasive-material processing, and exposed workshop installations | NEMA 23 or NEMA 34 | 1.5–6.0 N·m | 2.5–6.0 A/phase | 1.8° per full step | Improved resistance to dust and debris when the protection rating is appropriate for the installation | Clean the exterior without forcing debris past seals; inspect connectors, cable glands, and mounting surfaces. | Check contamination, connector corrosion, cable damage, seal condition, excessive friction, and driver alarms. |
Match the motor to workload, acceleration, travel speed, and frame stiffness. Do not rely on holding torque alone. A small motor suits engraving and light routing. Heavier cutting needs more torque and a stronger frame. Leave extra capacity for tool wear and sudden load changes.
Choose a low-inductance motor for rapid travel between cuts. Check the driver voltage and current together. High speed can reduce usable torque. Test repeated movements before cutting material.
It helps reduce missed-step risk during demanding production. It can monitor position and correct some motion errors. However, it cannot fix poor alignment or an undersized frame. Real testing still matters.
An integrated driver saves cabinet space and shortens wiring. It may simplify installation. Heat management becomes more important because electronics sit close to the motor. Provide airflow when the enclosure feels warm.
Mount the motor squarely on its bracket. Align the shaft with the leadscrew centerline. A flexible coupling tolerates slight movement, not serious misalignment. Tighten fasteners evenly. Leave enough cable length for smooth movement.
Disconnect power before wiring. Identify coil pairs with a meter because wire colors may vary. Connect each coil to the driver terminals correctly. Set phase current below the motor rating. Never unplug the motor while power remains connected.
Use motor steps per revolution, selected microsteps, and screw travel. Command a 100-millimeter move. Measure it with a caliper. Adjust the setting when the measured distance differs. Small errors can become visible across long cuts.
Excessive acceleration, heavy loads, or poor alignment may cause stalling. High current can create unnecessary heat. Reduce acceleration before increasing current. Check temperature after repeated cuts. I once blamed the motor, but the settings caused the failure. That lesson remains useful.
Choosing the right stepper motor is essential for achieving accurate, reliable, and efficient CNC machine performance. This guide explains what Stepper Motors are, how they convert electrical pulses into controlled rotary movement, and why they are widely used for positioning and motion control. It also reviews the key specifications to consider, including torque, step angle, holding power, operating voltage, current, speed, and compatibility with the machine’s workload. Based on these factors, ten suitable motor types are presented for different CNC applications, from light engraving to demanding cutting and routing tasks.
The article also outlines the basic installation and configuration process, including wiring, driver settings, mechanical alignment, and motion-controller calibration. To support long-term operation, it covers practical maintenance steps such as checking connections, reducing heat buildup, lubricating related mechanical parts, and inspecting for abnormal noise or vibration. A troubleshooting section helps identify common problems, including missed steps, overheating, inconsistent movement, and loss of torque.
